Antminer Xshell and USB Driver Installation Tutorial
-
When we use the universal test fixture to test the Antminer hash board, we need to install the Xshell software and USB driver on the computer to display the test log.
How to install Xshell software and USB driver?
Step 1: Download Xshell software and USB to TTL driver for free.
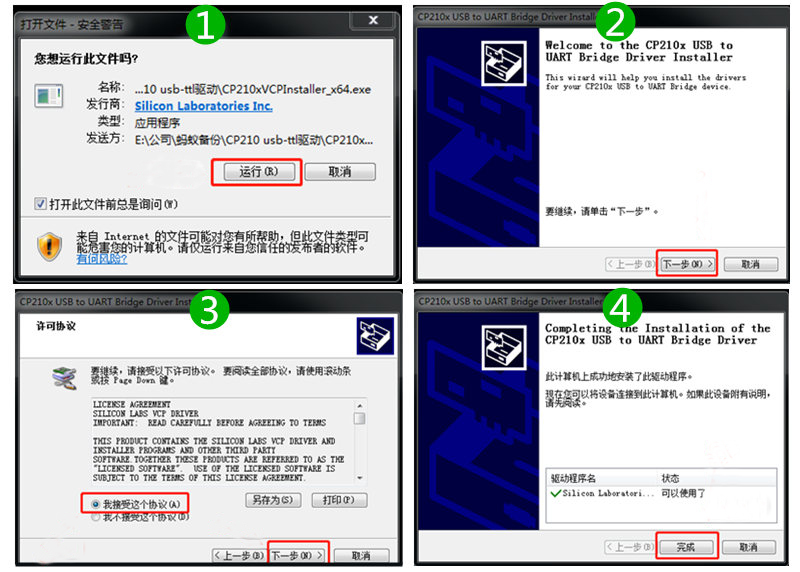
Step 2: Turn off the anti-virus software on the computer, and install the USB driver as shown in the figure below:
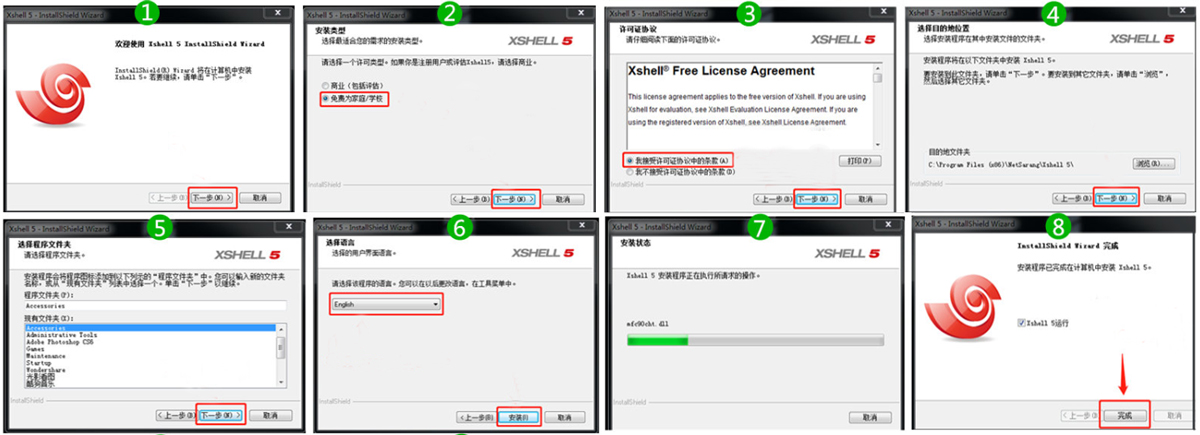
Step 3: Install Xshell software (optional language):
Step 4: After the installation is complete, we need to connect the USB interface of the test fixture to the computer (no need to power on the fixture), then find and record the USB port in the computer device management.

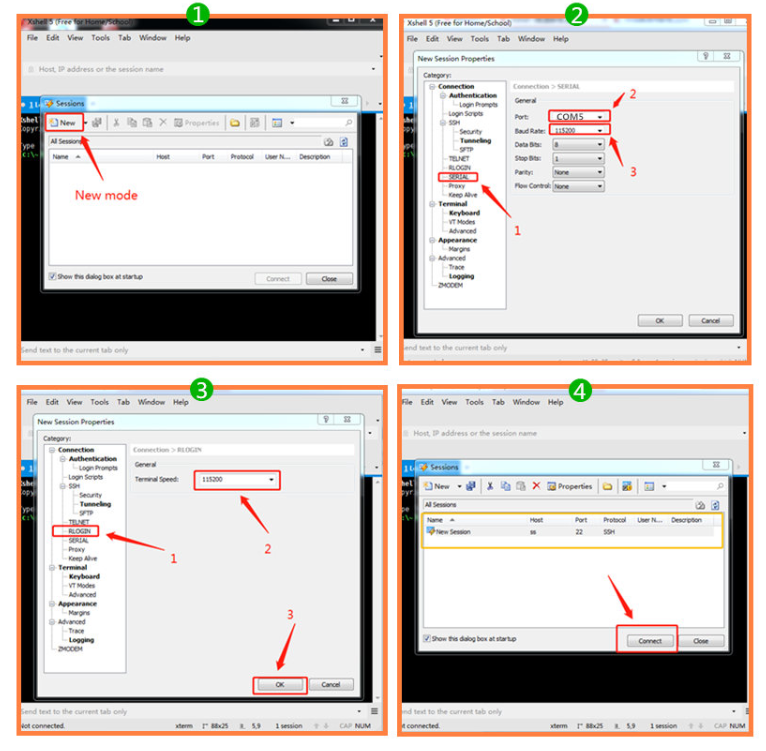
Step 5: Run and set the parameters of the Xshell software:
Key parameters:
Port: Corresponding to the USB port
Baud rate: 115200
Terminal speed: 115200
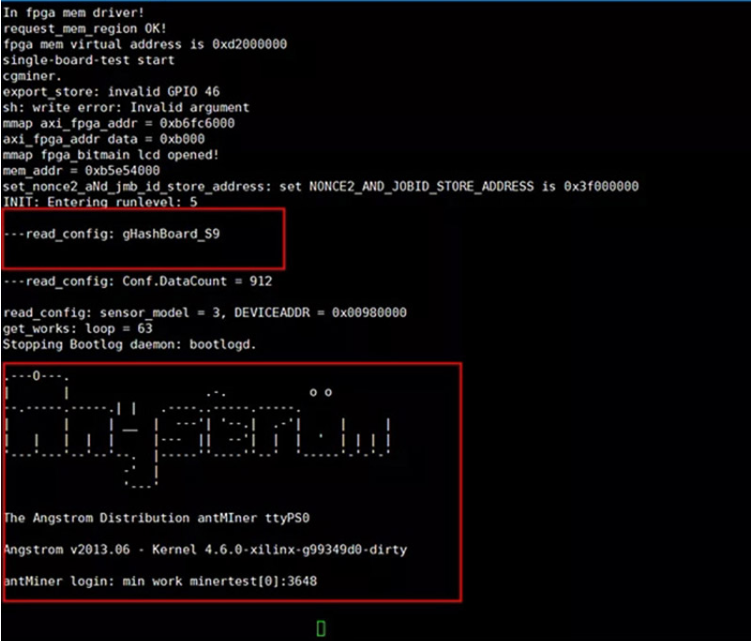
Step 6: Power on the test fixture, and the software will start self-test. After completion, you can use the test fixture to start testing the hash board (the data shown in the figure below is S9 as an example, and different TF card programs will have different data).
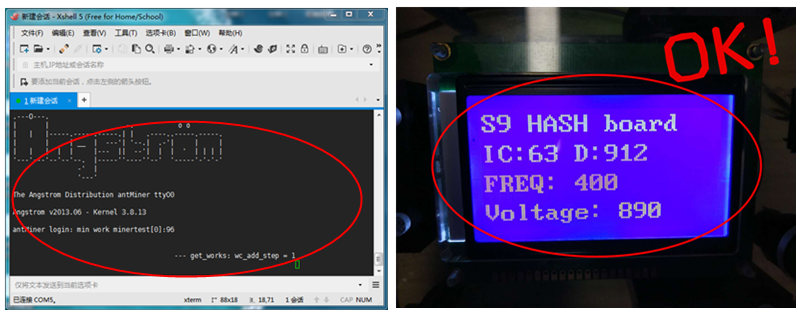
When you see the following interface, it means you can start testing the hash board.
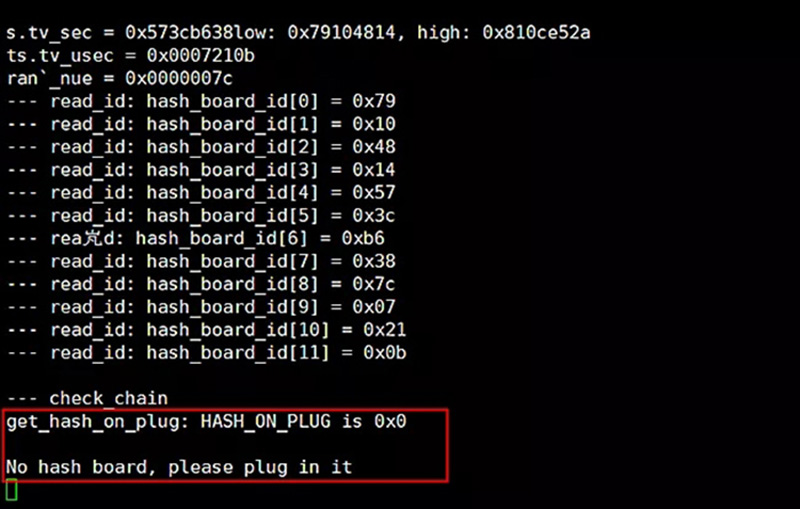
Press the "Test" button to test whether the device is working properly. If the hash board cannot be detected, Xshell will prompt "No hash board".
If a good hashboard is tested, a full hash board scan will be performed; if an abnormal hashboard is tested, the serial number of the bad chip will be displayed.
As a student of ZMRC training course, you can download Xshell program and USB driver for free.
Click To Obtain